DIY Whoville Tree
What You’ll Need
Prepping Your Station
Creating Your Whoville Tree
The Finishing Touches
“Every Who down in Whoville liked Christmas a lot”¦”
– How the Grinch Stole Christmas
Sure, our traditional Christmas trees are classically beautiful, but anyone who has seen The Grinch knows the Whos down in Whoville knew how to take Christmas decor to a new, whimsical level. The best-known Christmas decoration in Who-lore is their iconic curved conifer. This tree is as fun to make as it is to look at, and is a perfect weekend DIY to get you and the little ones in the festive spirit!
What You’ll Need
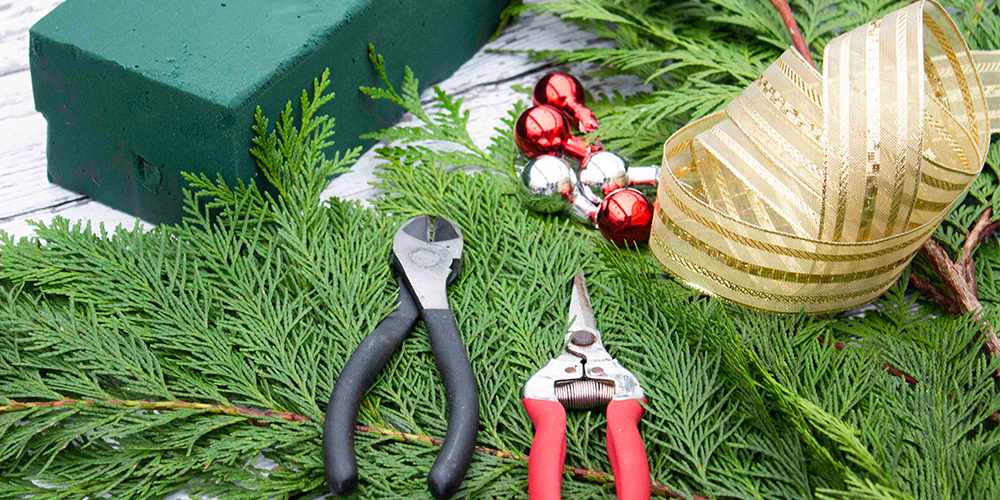
To get started with your Dr Seuss creation, you’ll need to grab a few supplies:
A container for your tree
Oasis floral foam
Port Orford Cedar, 3-5 branches
Western Red Cedar, 3-5 branches
Ribbon
1 large focal ornament
Smaller ornaments to fill the rest of the tree
Wire floral picks
12-gauge aluminium wire
Garden clippers
Scissors
Wire cutters
Bread knife
Prepping Your Station
To keep the D in DIY meaning “do” and not “disaster”, preparation is key – especially when working with children. Set up your stations first and keep your Whoville creation fun and safe for everyone involved.
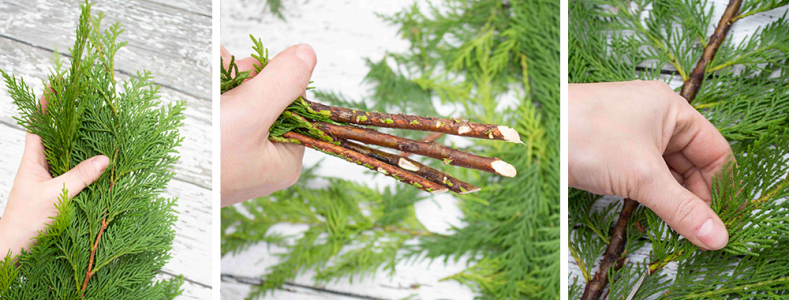
Cut your greens. Line up your Porch Orford Cedar branches, trim them all to about 2 feet in length, and set aside. Then, take your Western Red Cedar branches and chop off the smaller branches extending from the centre branch. Split these smaller branches into 2-3 pieces and set aside. (Pro tip: Always cut stems on an angle to allow for maximum water absorption.)
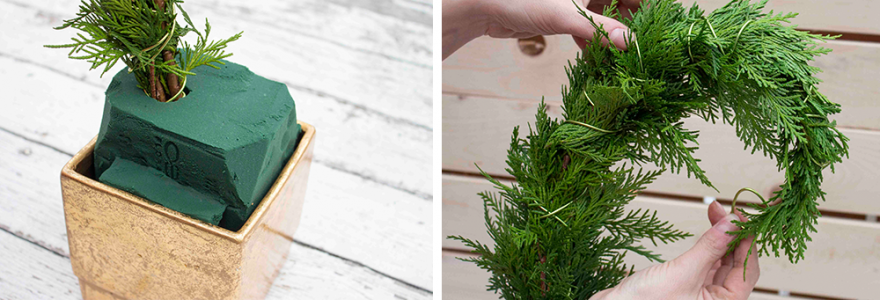
Soak your foam. Fill a bucket with hot water, place your floral foam on top, and let it sink like an anchor in the sea. It’s a much slower process than giving it a nudge under the surface, but this method will prevent air pockets in the foam that will dry out your greens.
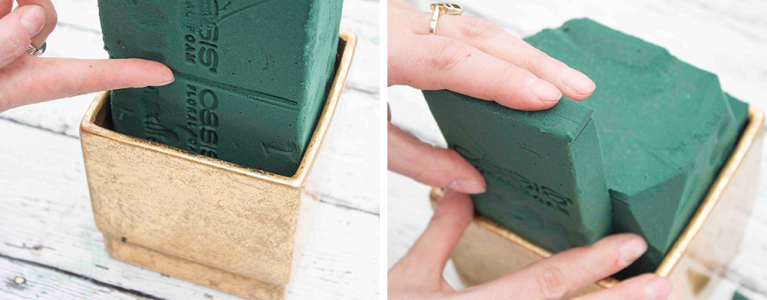
Fit your floral foam. Once saturated, drop your floral foam block into your container and trim away any excess foam 1 ½ inches above the top. Don’t go tossing away that extra foam like the wrapping paper on Christmas Day just yet, though. Use whatever you need to fill in the gaps between your block and the sides of your container for a sturdy fit.
Creating Your Whoville Tree
While it usually makes us cringe to see our plants drooping in any way, the most iconic part of this cartoon tree is its curved shape. Here’s how to make that happen:

Grab your trimmed Port Orford Cedar branches – which we use because they’re nice and floppy for the ultimate curve factor – and 2 pieces of aluminium wire about 3 feet in length each.
Bundle the branches together in your hand and wrap them together with one of the pieces of wire, using a spiral motion, and leaving a few inches at the bottom. Be sure to keep the wire tight as you wrap – you’ll need it to be strong enough to hold ornaments!
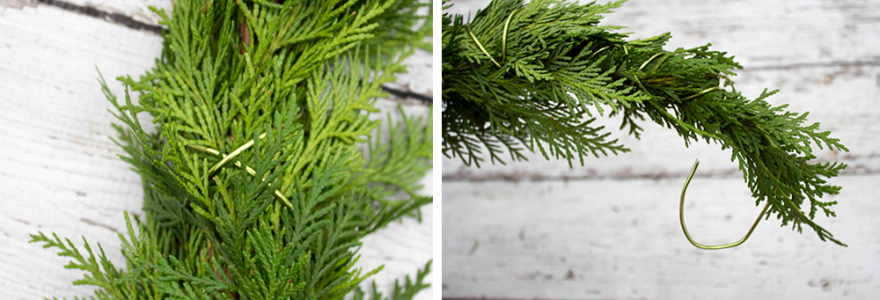
After you’ve wrapped it once, grab the second piece of wire and repeat in the opposite direction to create a criss-cross effect. Once you reach the tip, use the excess wire to create a hook that will hold your focal ornament.
Once it’s wrapped not once, but twice, you can shape the bend of your tree. Don’t worry about it being perfect just yet – you can always adjust it as you add elements for that perfect touch.
To pot your Whoville Tree, simply stick it into the foam slightly off-centre to keep it balanced. Plan your positioning carefully first. You should only push it into the block once and leave it there, or you’ll squeeze all the thirst-quenching ability out of it. If it doesn’t look just right – that’s okay! Like I mentioned before, you can always adjust your bend to fit.
The Finishing Touches
By now your show-stopping centrepiece is taking shape, but your arrangement isn’t quite ready to make the Grinch’s heart grow 3 sizes just yet. Give it that extra bit of oomph with these finishing touches:
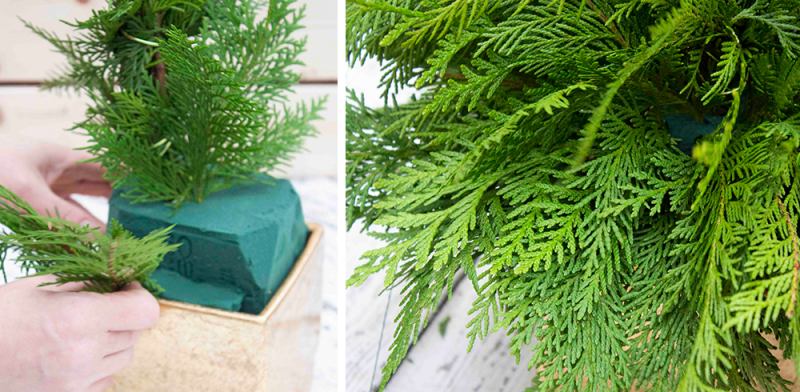
Fill it out with greens. Remember those little Western Red Cedar clippings from earlier? Grab them and begin sticking them into the rest of the foam base. Start in the centre around your tree and work your way outward, turning as you go. Continue filling until the foam disappears!
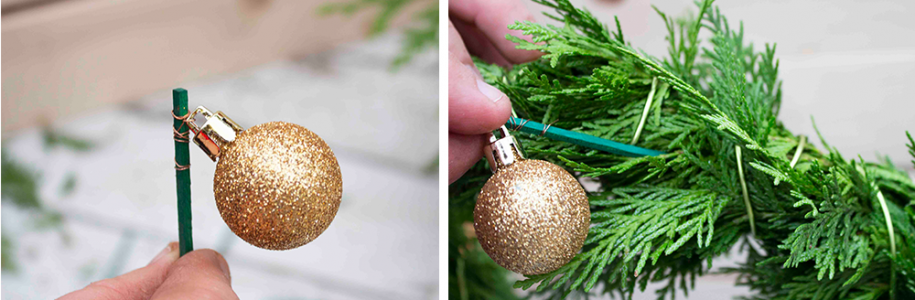
Add your focal ornament. Whether you’re using a grandiose vintage bulb or a modern, whimsical shape, dangle your featured piece from your wire hook at the tip.

Fill in your tree. Working in groups of 3-5, add ornaments around your tree. Use whatever colour scheme you like, or none at all – just make it uniquely you!
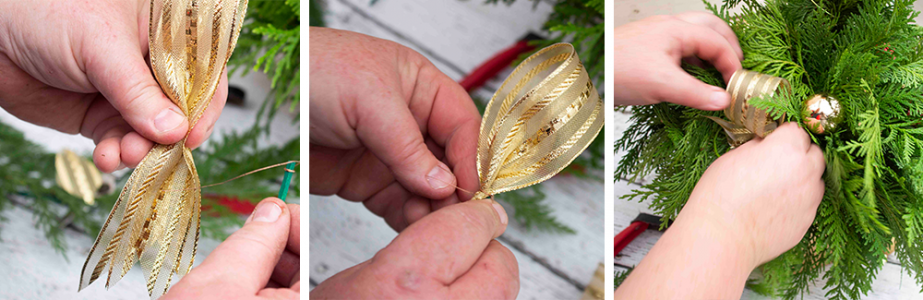
Add ribbon tabs. To make the ribbon billow out from your tree, take pieces and fold them in half. Pinch them in the centre and use a wire to secure it in place, leaving a little extra to attach it to your tree or foam.
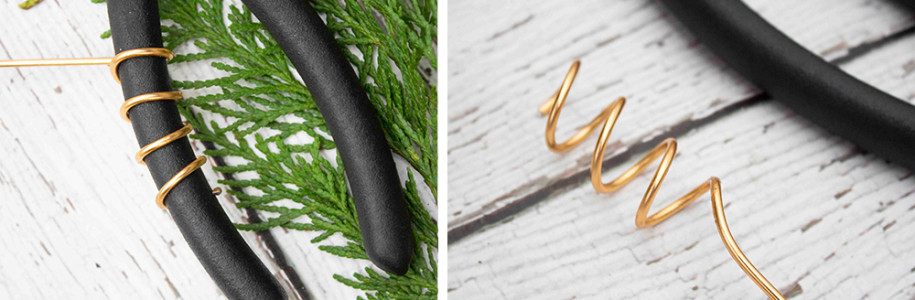
Add wire spirals. To make your own wire spirals, simply take your wire and wrap it around the handle of your clippers or even a pen, leaving a straight piece at the end. Slide it off and stick it into your tree or foam for an artistic touch.
Add other decorations using floral picks. Use the little piece of wire to attach any ornament to your arrangement to personalize however you want. The wooden pick will do all the heavy lifting in keeping it in place so you can put it wherever you so choose!

With the final personalizing touches, there you have it! Your very own Whoville tree that will have everyone as green as the Grinch with envy.
Dig in with Alberta’s Best Gardening Blog for more DIY tutorials!